 Have you ever needed to photograph a batch of objects in a consistent, repeatable way? I needed to take photos of more than 200 vinyl records to list on eBay. I couldn’t face the idea of doing this without some automation, so the Arduino-shutter-button-presser was born.
To take the best photo of each record, I wanted the camera and subject lined up squarely, zoomed in close, focused and exposed nicely — for each side of 71 LPs and 180 singles. No way was I going to take all of those photos hand-held. A tripod helps with holding the camera, but it’s easy to bump the setup when using the shutter, and camera shake can still be an issue when pressing the shutter release. What I really needed was a remote shutter release like the pros use, but my compact Panasonic camera doesn’t have that feature. 🙁
Arduino technology to the rescue!
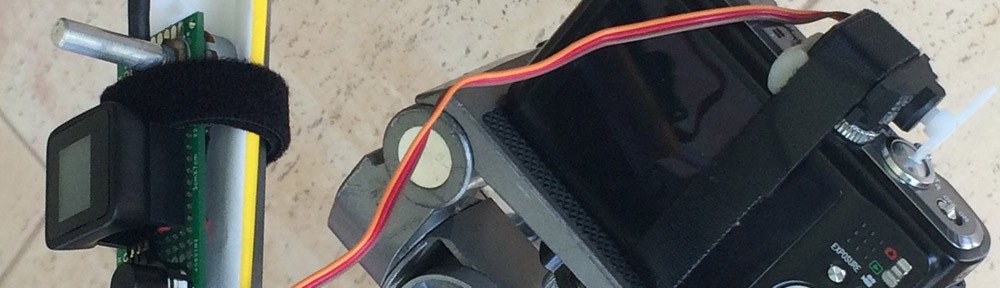
I brought together a MicroView (an Arduino with a display) that I’d received from backing the MicroView kickstarter project, a servo, a switch on a long piece of wire, a variable resistor, some mouldable plastic and a piece of velcro. Then I tied it all together with a day’s work and some Arduino code.
A servo is a small, light motor that can be told to rotate to a specific angle. They’re typically found in remote controlled cars, boats and planes and let the controller make settings like ‘turn the wheels 10 degrees left’. A servo with a small arm fitted, sitting atop the camera and told to move the right amount should press the camera shutter button. Ideally, though, it would half-press first to set the camera’s focus and exposure, pause, and then fully push the shutter button.
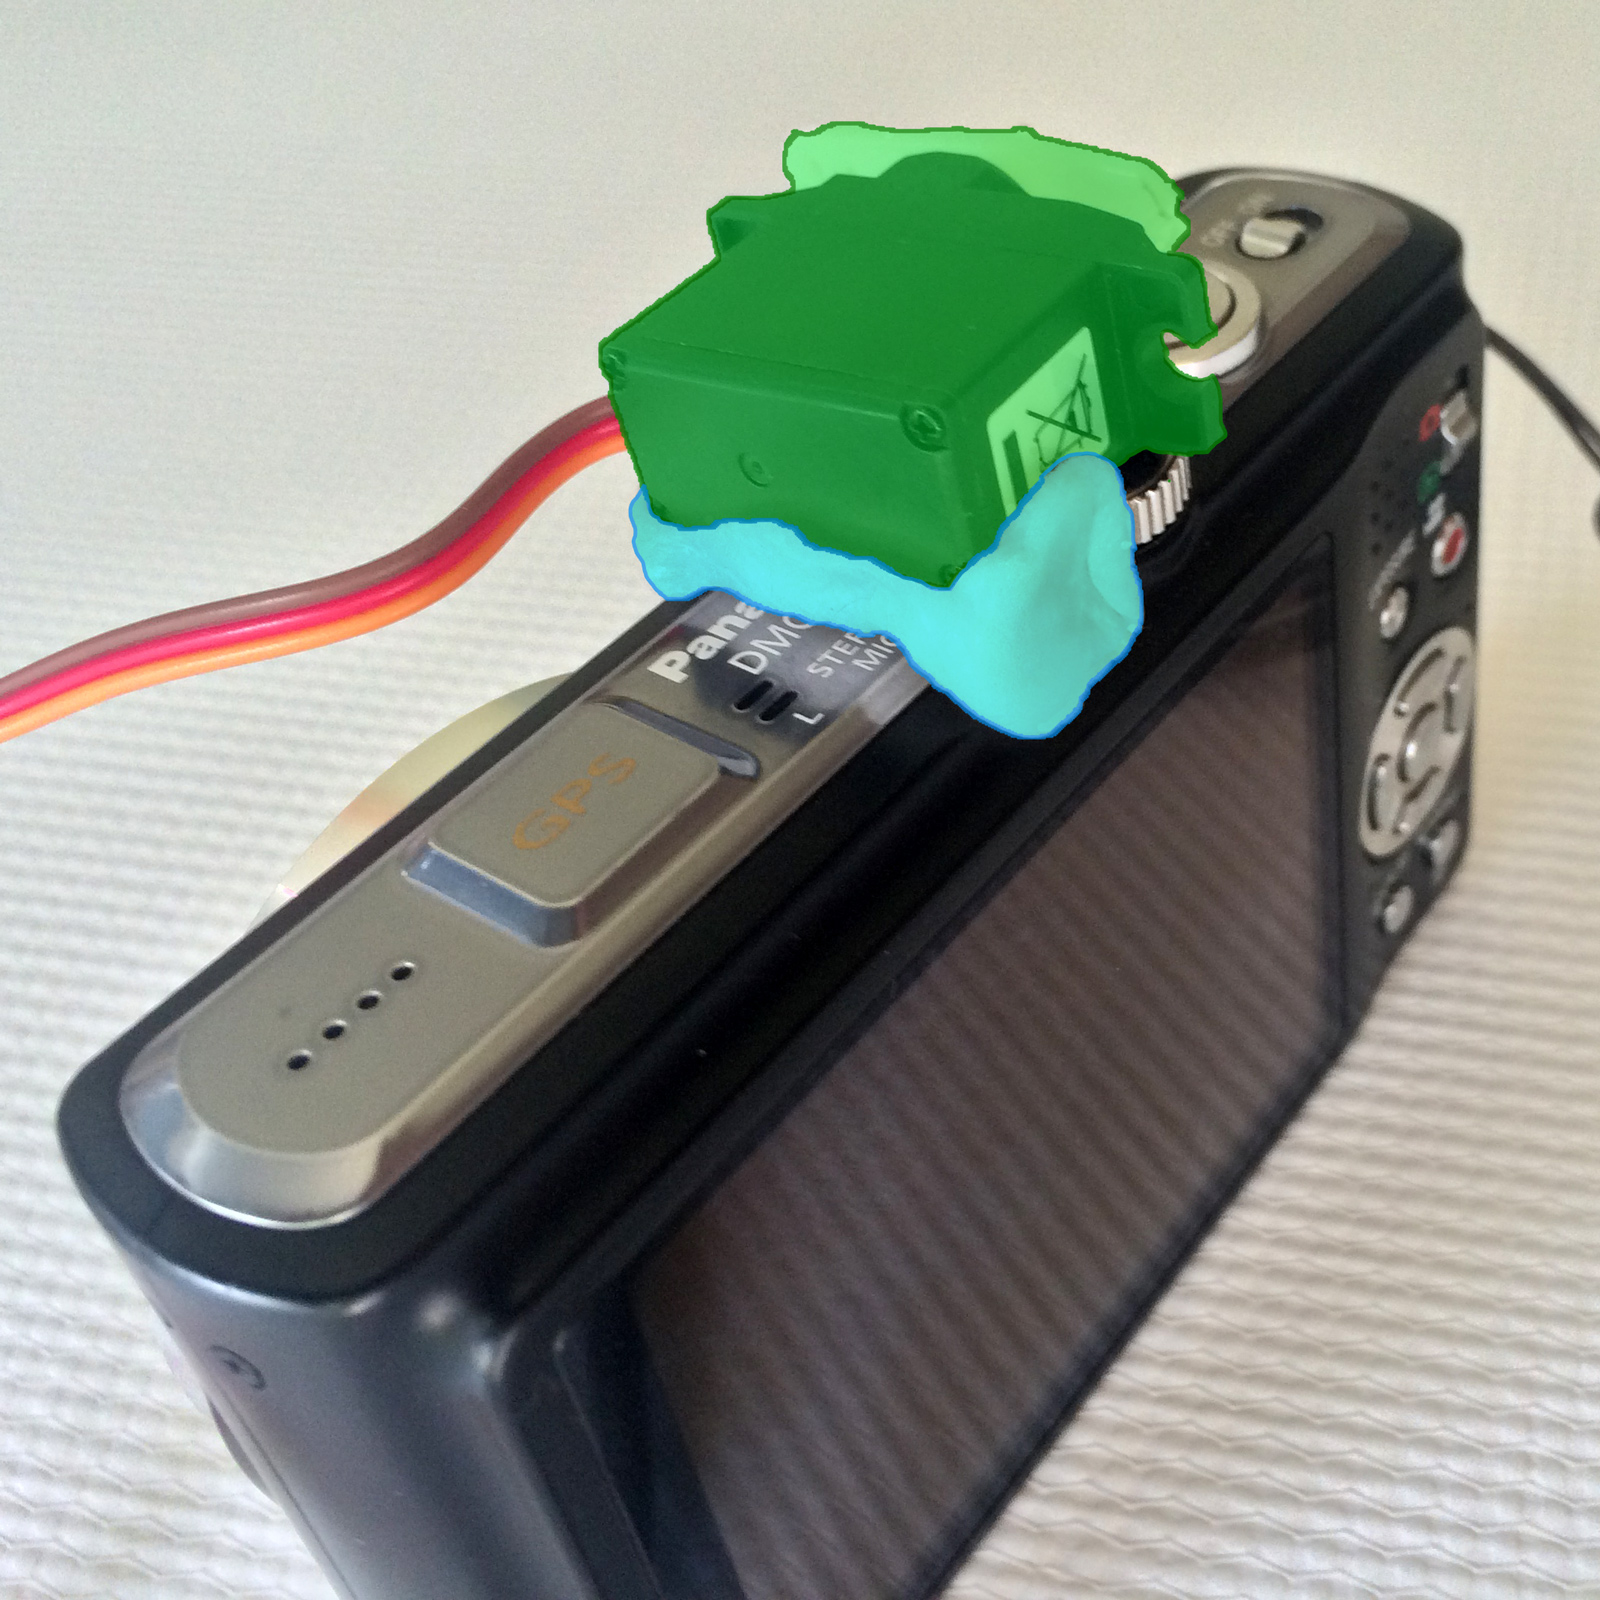
Polymorph bracket (light blue) stabilises servo (green) on top of the camera
The first problem to solve was that the top of my camera isn’t flat and the servo needed to be held down so that it could push on the button without lifting itself up. Polymorph plastic pellets melt in hot water, and can be moulded to any shape. The plastic sets hard when it cools and it’s reusable. I covered the camera and servo in cling film to prevent water or sticky hot plastic damage, melted some polymorph and then sandwiched it between the camera and servo, moulding the plastic to the shape of both objects simultaneously. Perfect result, first time!
The Arduino can drive a servo directly, so I didn’t need any special electronics or circuits. The next step was to program the Arduino to react to the remote shutter release and move the servo the correct amount. The half-press and full-press operations need to be calibrated as the servo can sit a little differently each time it’s attached, or it could even be on a different camera. So, at start up the Arduino steps through a calibration sequence — the display on the MicroView is invaluable for displaying instructions and status as calibration takes place. This is the calibration sequence:
- Turn the knob (a variable resistor) and position the servo accordingly. When the arm is not touching the shutter, press the remote release button to store this position.
- Turn the knob to move the servo arm until the camera registers a half press. Press the remote release button to store this position.
- Turn the knob a little further until the camera takes a photo. Press the remote release button to store the full-press position.
Once the three servo positions are known, it’s ready to use. When the remote button is pressed, the Arduino moves the servo to the half-press position, waits 1 second to allow the camera time to focus, then moves the servo to the shutter fully pressed position for about half a second, then returns the servo to the neutral/unpressed position.
That was pretty much all I needed, but a little bit of fine tuning was hard to resist. So now the program:
- uses the MicroView display to show the number of images taken and the time elapsed since the last image was taken
- half-presses the shutter every minute or so of idle time to stop the camera from turning off or going to sleep
- incorporates a time lapse mode. If the button is held down when the Arduino is first turned on, normal calibration happens, but there is also a time delay setting using the knob. Once setup is complete, it automatically presses the shutter every x seconds and updates the display accordingly.
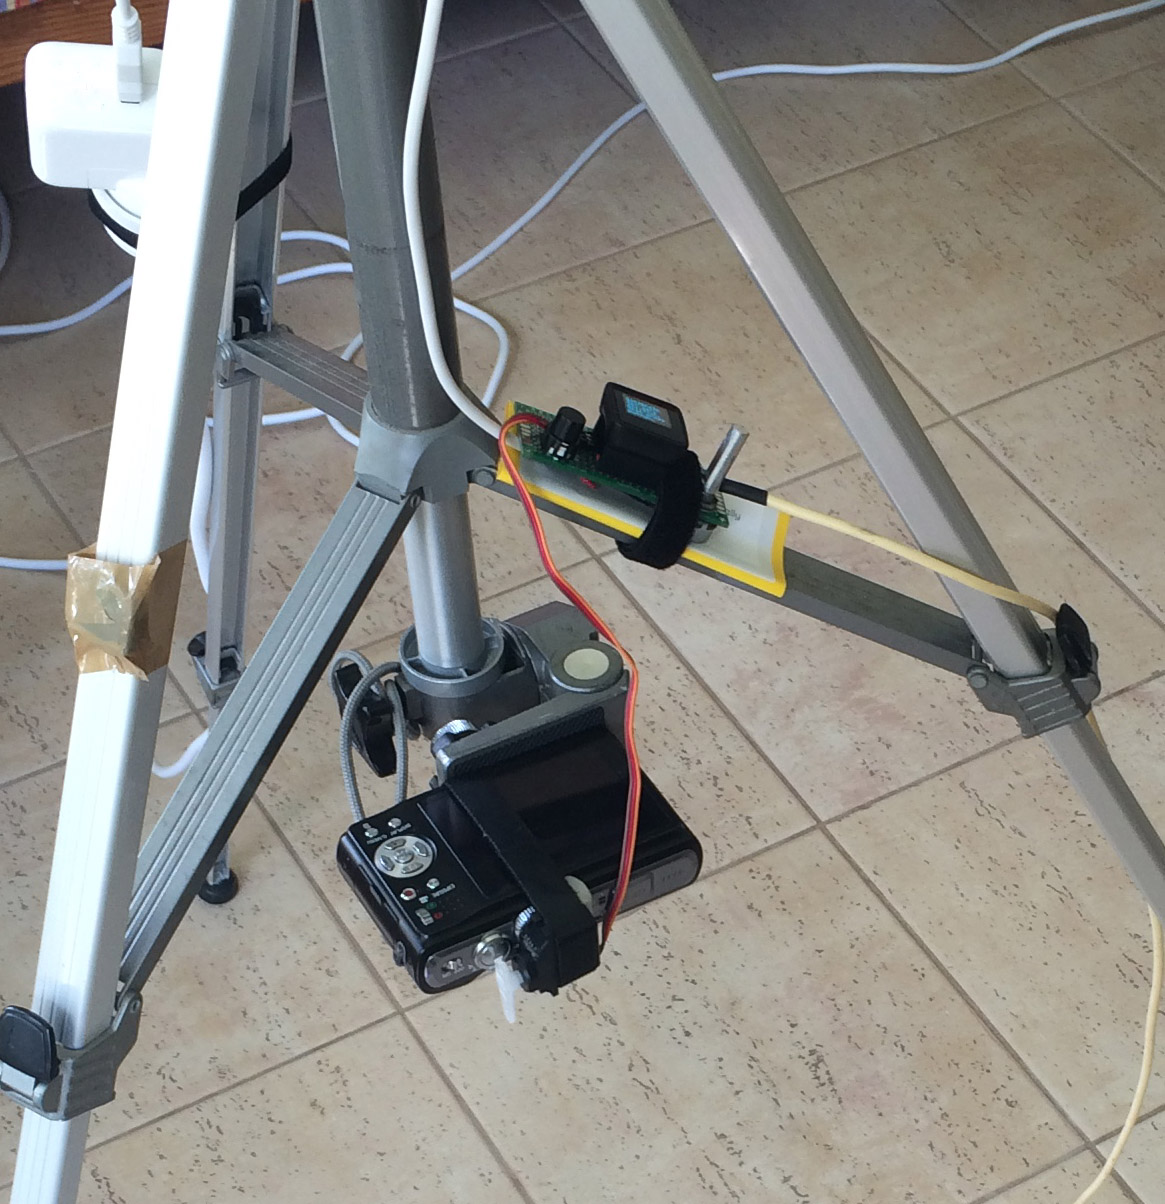 Now we’re talking! With the camera on a tripod, bits of velcro everywhere and the Arduino powered up and calibrated, I photographed the 71 LPs, front and back in less than 45 minutes. Best of all, they were framed identically, square on to the camera and easy to crop for listing on eBay. Just what the mad scientist ordered. 🙂
Arduino MicroView code and schematic diagram are available here.
An incredibly nifty piece of work, as usual. You did such a brilliant job of photographing all those records that eBay buyers couldn’t resist buying them. I’m looking forward to spending our earnings.