
 This is a more technical post relating to my earlier one about monitoring roof-space temperatures — where I considered whether I might be able to move my computer gear into the roof space.
Below, you’ll find a simple list of items I used in this project and the code I wrote for the Arduino and for the web page that the Arduino uploaded data to.
Parts and power source
These are the parts I used:
- An Arduino Duemilanove
- An Ethernet Shield
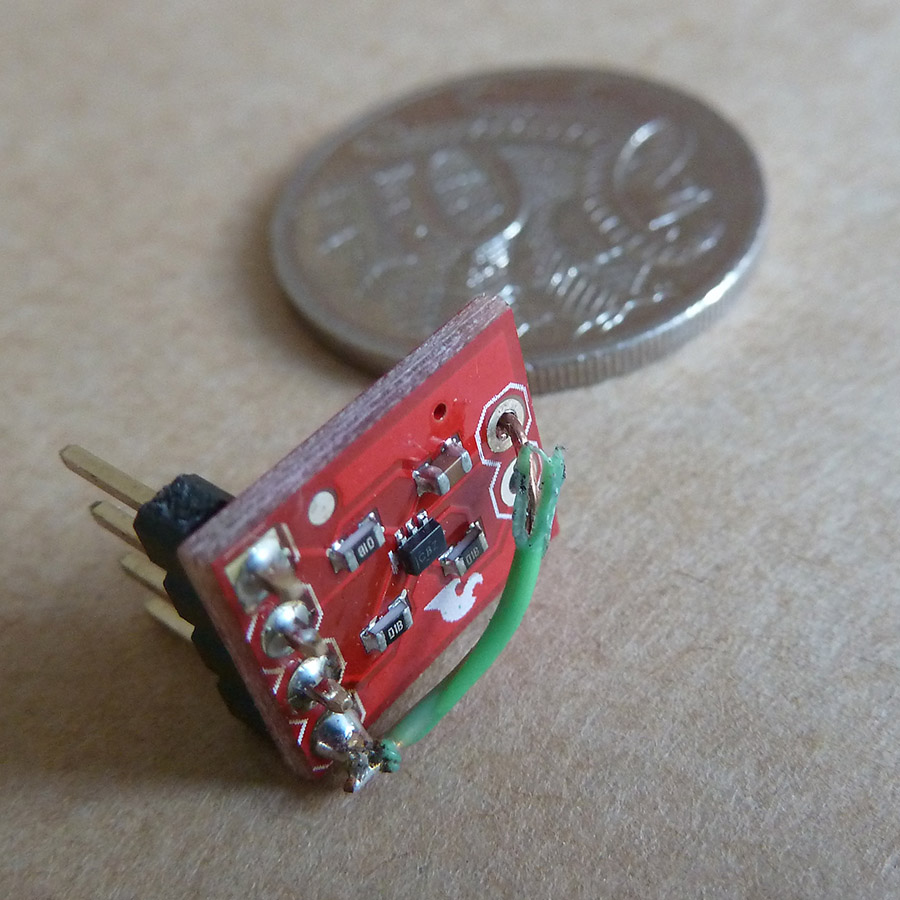
- 2 x Sparkfun TMP102 I2C temperature breakouts sourced from Little Bird Electronics
- Cat-5 network cable to connect the roof sensor
Since the monitoring was only to be carried out for a short time, I powered the Arduino from a computer USB port. Connections to the sensors were done on a breadboard and the whole lot was just left sitting on the study desk. Messy, but functional.
Arduino wiring
There were just 3 major connections made to the Arduino:
- USB for power and programming
- Ethernet cable for networking
- Cat 5 cable for the sensors — connected to Analogue pins 4 (SDA) and 5 (SCL), 3.3V power and ground
Putting it together
The main loop of the Arduino’s code sampled the two sensors and then built a URL to request on the web server. The URLs looked something like host.com/temp.php?t1=298&t2=507. After the web site responded (the response itself was meaningless and ignored by the Arduino), the Arduino waited 10 minutes and then did it all over again.
PHP coding in the web page extracted the two temperature readings (t1 & t2) from the URL requested and inserted these into a MySQL database along with the date and time the request was received.
When it was time to read data back, a different php page queried the temperature table and sent back a table of values and a graph (using jpGraph). If I were to do this project again, I’d probably save myself the effort that went into coding the PHP and instead use a service such as Xively or ThingSpeak — ‘Internet of Things’ services which allow anyone to upload sensor data and graph it with a minimum of effort.
Connecting the sensor in the roof looked like it would be a bit tricky. This was strictly a temporary setup, so no new holes were allowed in the walls or ceiling. It had to run for weeks, so stringing wires across rooms wasn’t an option. To top it off, forums on the net suggested that I2C would probably not function if the connecting cable was more than a couple of metres long.
A couple of years ago, I pulled a Cat 5 networking cable through the walls up into the roof space, but still hadn’t got around to putting it into service. It was at least 20 metres long, but it had the advantage of both its ends being in exactly the right places — the study and roof space. I decided to have a go at connecting the sensor this way, despite it being ten times longer than anyone thought would work — nothing to lose by trying…
I used a couple of pairs of wires from the network cable (network cables have 8 wires, twisted together as 4 pairs): one pair for data, another for power. It worked perfectly first time. I believe this might be due to the twisted pairs naturally reducing electrical noise and interference.
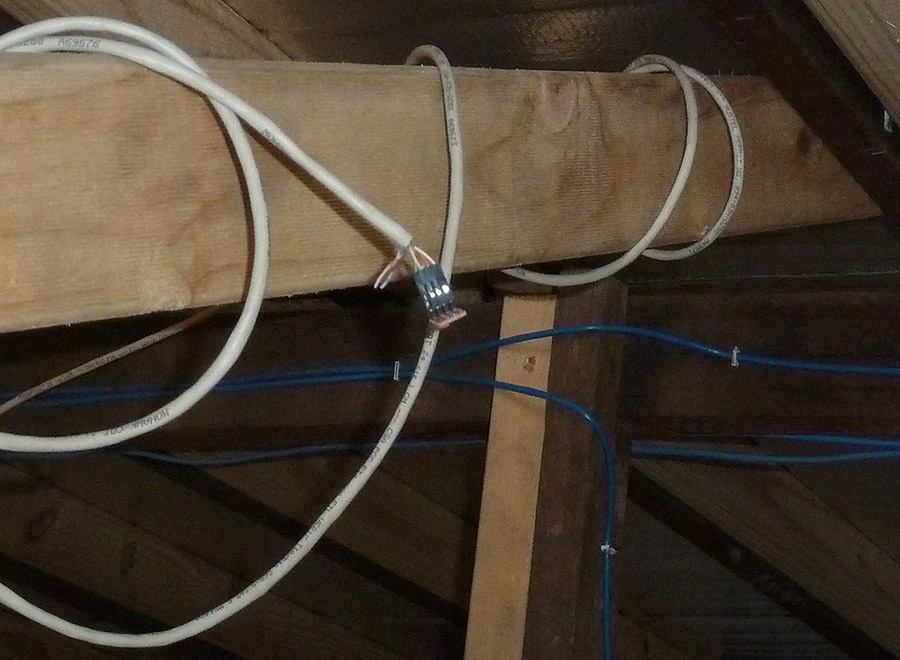
Cat-5 run to TMP102 in roof
The code
Here’s the Arduino code I wrote:
#include <Wire.h>
#include <Ethernet.h>
#include <SPI.h>

// set variables, including TMP102 i2c addresses
const int tmp102a = 0x48;
const int tmp102b = 0x49;
byte MSB,LSB;
int tempA, tempB;

// set ethernet MAC address and hard code server's IP
byte mac[] = { 0xDE, 0xAD, 0xBE, 0xEF, 0xFE, 0xEE };
byte server[] = { nnn, nnn, nnn, nnn };

// set strings for base URL and HTTP request
const String urla = "GET /temps.php?t1=";
const String urlb = " HTTP/1.1";
const String host = "Host: hostedsite.com";

EthernetClient client;

// initialise ethernet and wire libraries
void setup() {
   Wire.begin();
   Ethernet.begin(mac);
 }

void loop() {
// read sensor 1, two bytes, combine into a single integer value
  Wire.requestFrom(tmp102a, 2);
    MSB = Wire.read();
    LSB = Wire.read();
    tempA = (((MSB << 8) | LSB ) >> 4);

// read sensor 2, two bytes, combine into a single integer value
  Wire.requestFrom(tmp102b, 2);
    MSB = Wire.read();
    LSB = Wire.read();
    tempB = (((MSB << 8) | LSB ) >> 4);

// send values to server PHP page
  sendtemp();
}

void sendtemp() {
  String url2snd = urla;

// form up the full URL into string url2snd
  url2snd += tempA;
  url2snd += "t2=";
  url2snd += tempB;

// start port 80 connection, send HTTP headers and URL
  if (client.connect(server, 80)) {
    client.print(url2snd);
    client.println(urlb);
    client.println(host);
    client.println();
  }
  else {
    Serial.println("connect failed");
  }

// stop ethernet connection
  client.stop();

// wait 10 minutes
  delay(600000);
}
Notes:
- The I2C slave address for the temperature sensor is 7 bits long. It took me a while to work out exactly how to address the sensors since the data sheet gives only the 7-bit number (i.e. 0b1001000) — Turns out this needs to be right-aligned in a full byte, which gives 0b01001000 or 0x48.
- The TMP102 returns a 12-bit reading in two bytes, hence the bit-shifting code to reassemble them into a 16-bit integer value.
- The integer read from the TMP102 needs to be multiplied by 0.0625 for the reading to be in degrees celsius. I chose to do this in PHP on the server rather than on the Arduino. When it’s 20 degrees, the sensor gives a value of 320.
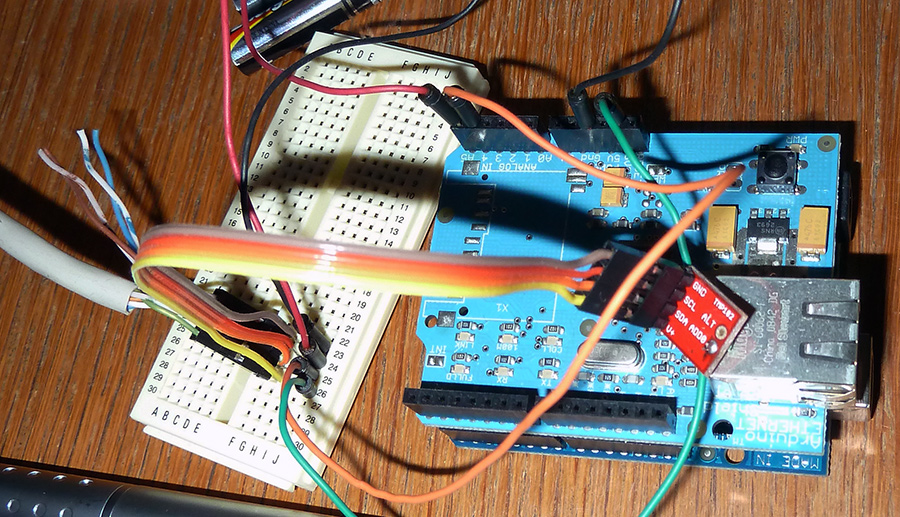
Arduino prototyping: quick and effective, but not necessarily pretty.
The PHP code below has been altered a little from the version that was used for uploading, but the essential functionality is still shown here. To be completely honest, I can’t remember what all the shenanigans with the URL arguments are all about, but it worked fine!
Also, the PHP web page was for the purposes of this project and my information only, not for public use — there’s no parameter or range checking, no authentication, basically no safeguards to ensure the data is correct and from a legitimate source. A public page would need much better coding than what I’ve published here.
<?php
// create a database handle
$dbh = mysql_connect ("localhost", "temps_db", "password");
mysql_select_db ("temps_db", $dbh);

// if an argument is supplied to the script,
// extract details into sensible hash values

if ($argv) {
  foreach ($argv as $k=-->$v) {
    if ($k==0) continue;
    $it = explode("=",$argv[$i]);
    if (isset($it[1])) $_GET[$it[0]] = $it[1];
  }
}

// if an argument called t1 is present,
// assume it's a legit call to add new readings

if ($_GET['t1']) {
  $tmp1 = $_GET['t1']*0.0625;
  $tmp2 = $_GET['t2']*0.0625;
  $qry = "INSERT INTO tbl (temp1, temp2) VALUES ($tmp1, $tmp2)";
  mysql_query($qry);
}
?>