In August this year, I had a brilliant day at the snow (Falls Creek) with my lovely wife, sister-in-law and nephew, followed by a day of cruising around the Kiewa and Ovens valleys, enjoying the scenery and searching for treasure in every junk and antiques store we saw.
I found this ugly duckling lamp for $15 at the Co-op Collectibles Vintage Store in Dederang. Surely that mucky bakelite and rusty metal could be made more interesting! What on earth were they thinking with that concrete block though?

“Unrealised potential”
This was actually a pretty straightforward mini-project — dismantle, clean, strip, restore, assemble and find something to replace that awful concrete block.
The shade was a taped-up, faded mess that required cleaning and polishing. I repaired the crack by carefully filling with superglue and then scraping away any excess glue. It cleaned up really well, but you can still see the discolouration at the bottom where insulation tape held it together for many years.
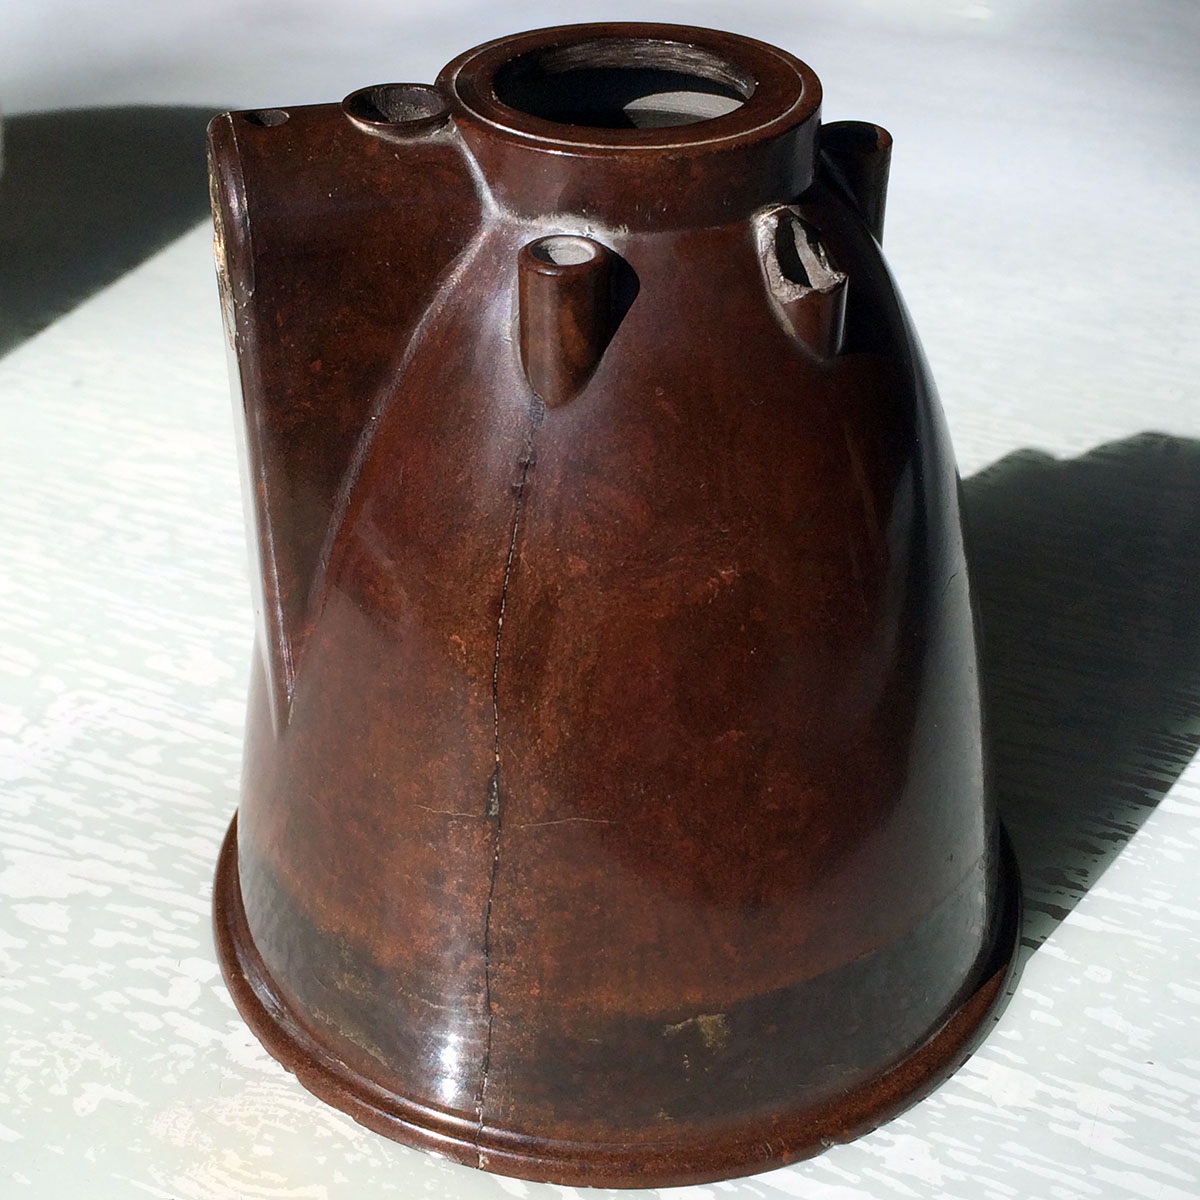
Polishing almost finished and crack sealed with super glue. The dark band at the bottom is where insulation tape held the shade together for umpteen years.
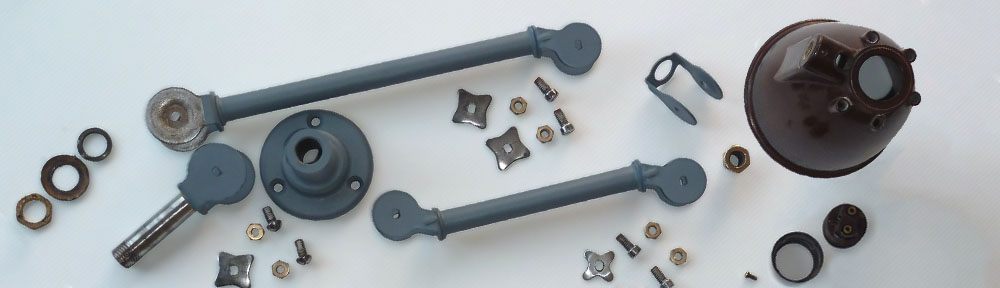
Dismantling was straightforward. I stripped, cleaned and undercoated the parts before spraying the arms and base with satin black. I used a drill-mounted cloth wheel and polishing compound to clean up the shiny metal, and then finished them with Mothers mag and aluminium polish.
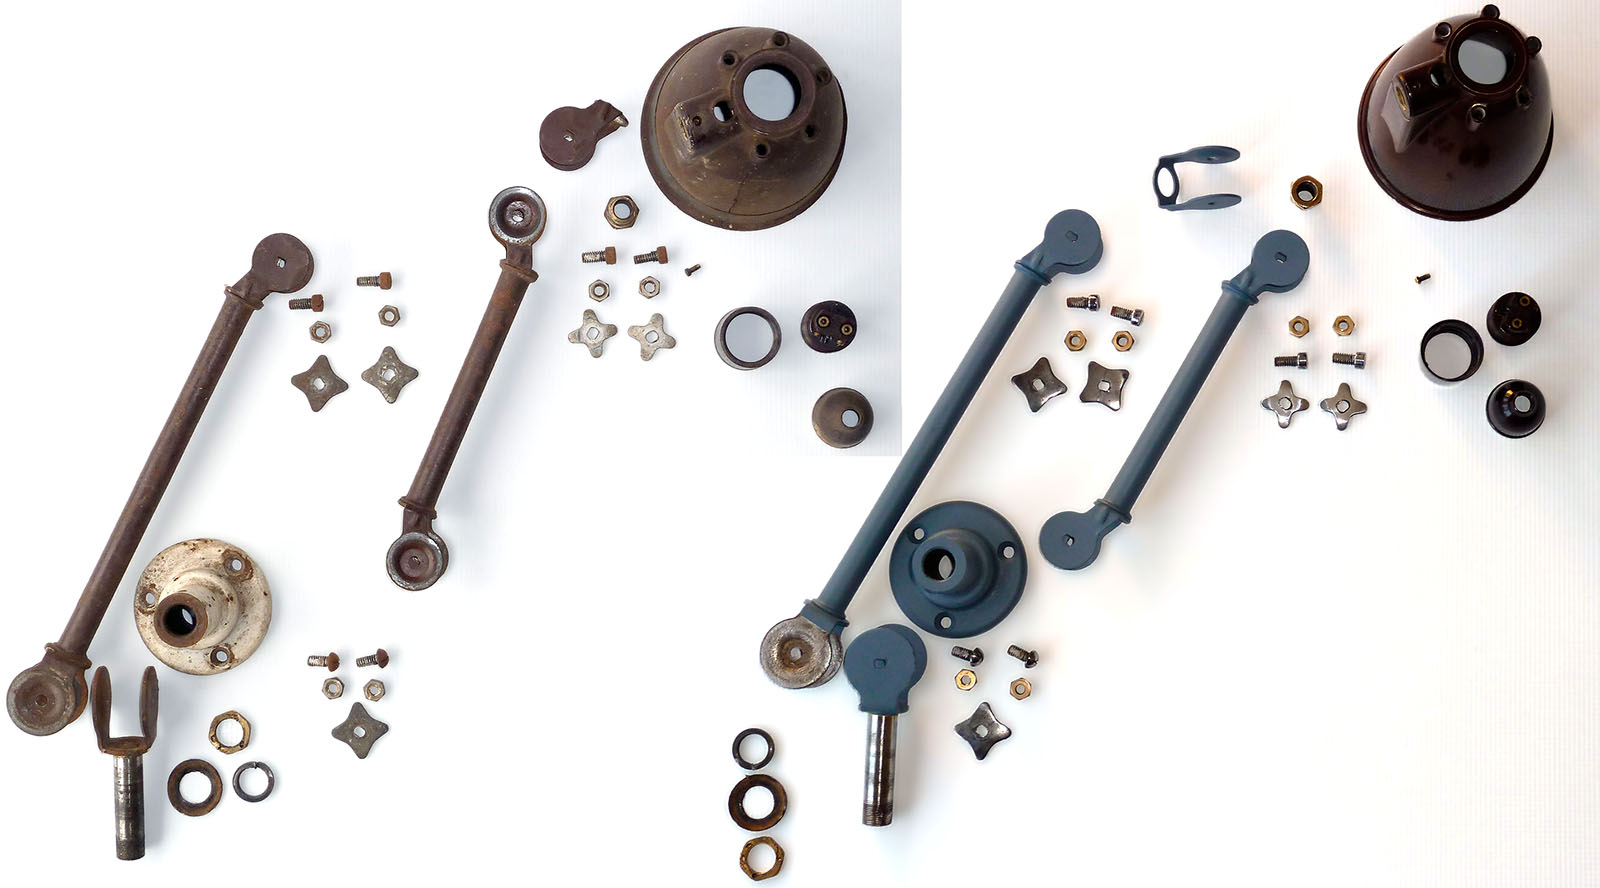
All the components as purchased (left) and after cleaning up and undercoating.
I bought an old-school mechanical switch from Waverley Antique Bazaar for just $5. It complements the lamp nicely and all it needed was a quick test and polish.
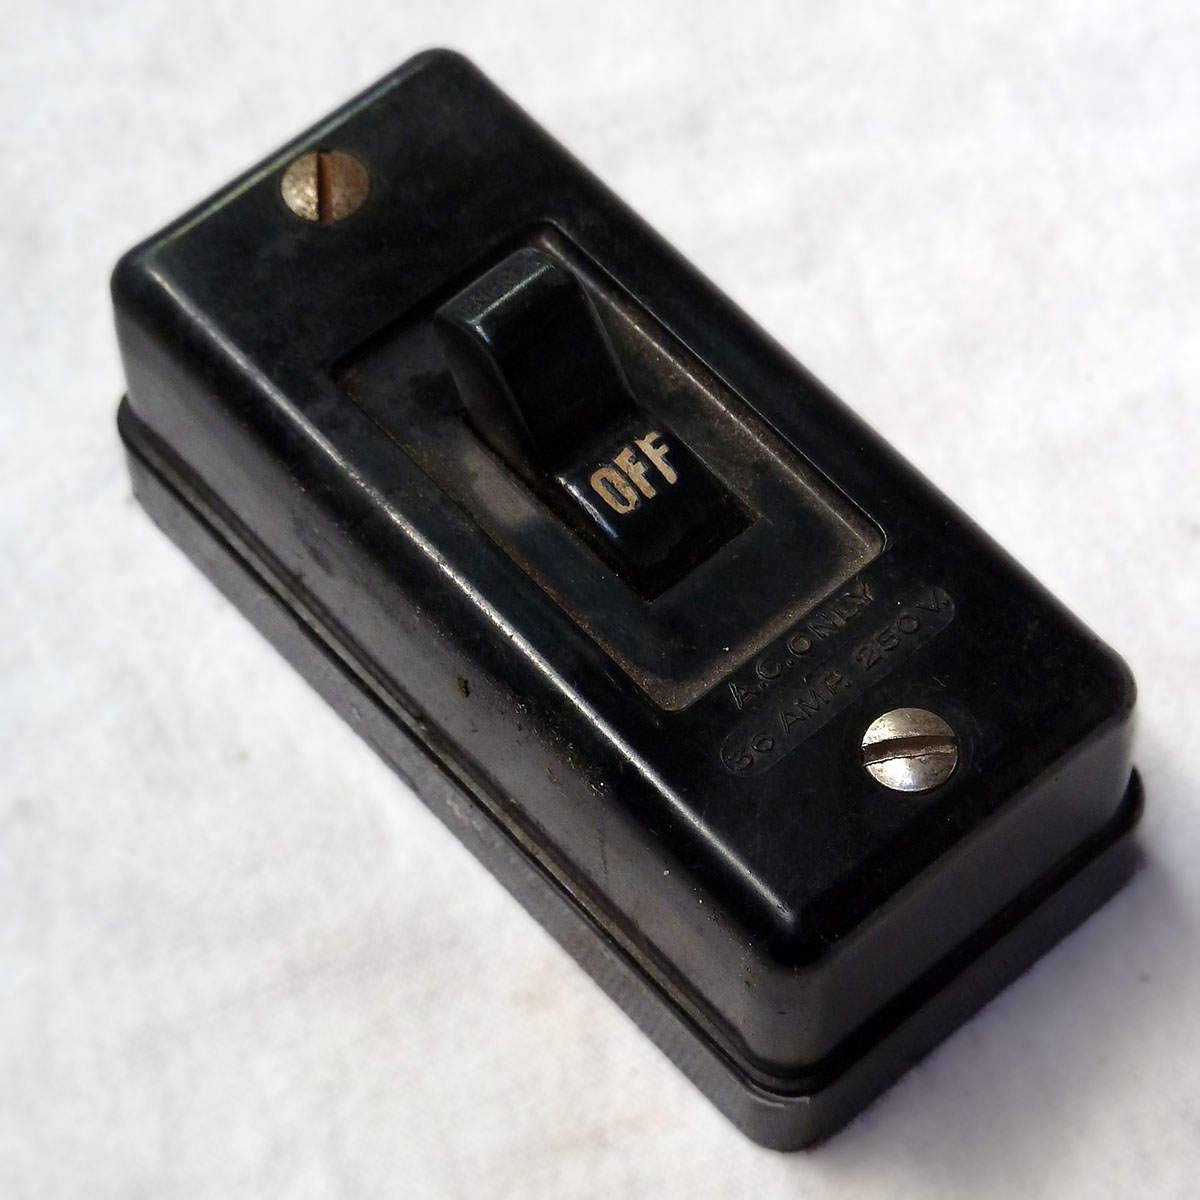
Bi-modal electron flow controller.
The red gum block came from an old bench pulled out of our garage 15+ years ago. I trimmed off the weathered surface using my table saw, then carefully drilled and routed to accept the cables, switch and lamp base.


The cloth-covered cord has a lovely retro vintage look and it suits this lamp to a tee. Lots of cloth covered cords are available online, but this one is from 2k labware’s stall at Waverley Antique Bazaar. I’m particularly pleased with how tidy the underside is, especially the cable routing and the handmade wooden straps that hold the lamp cord.
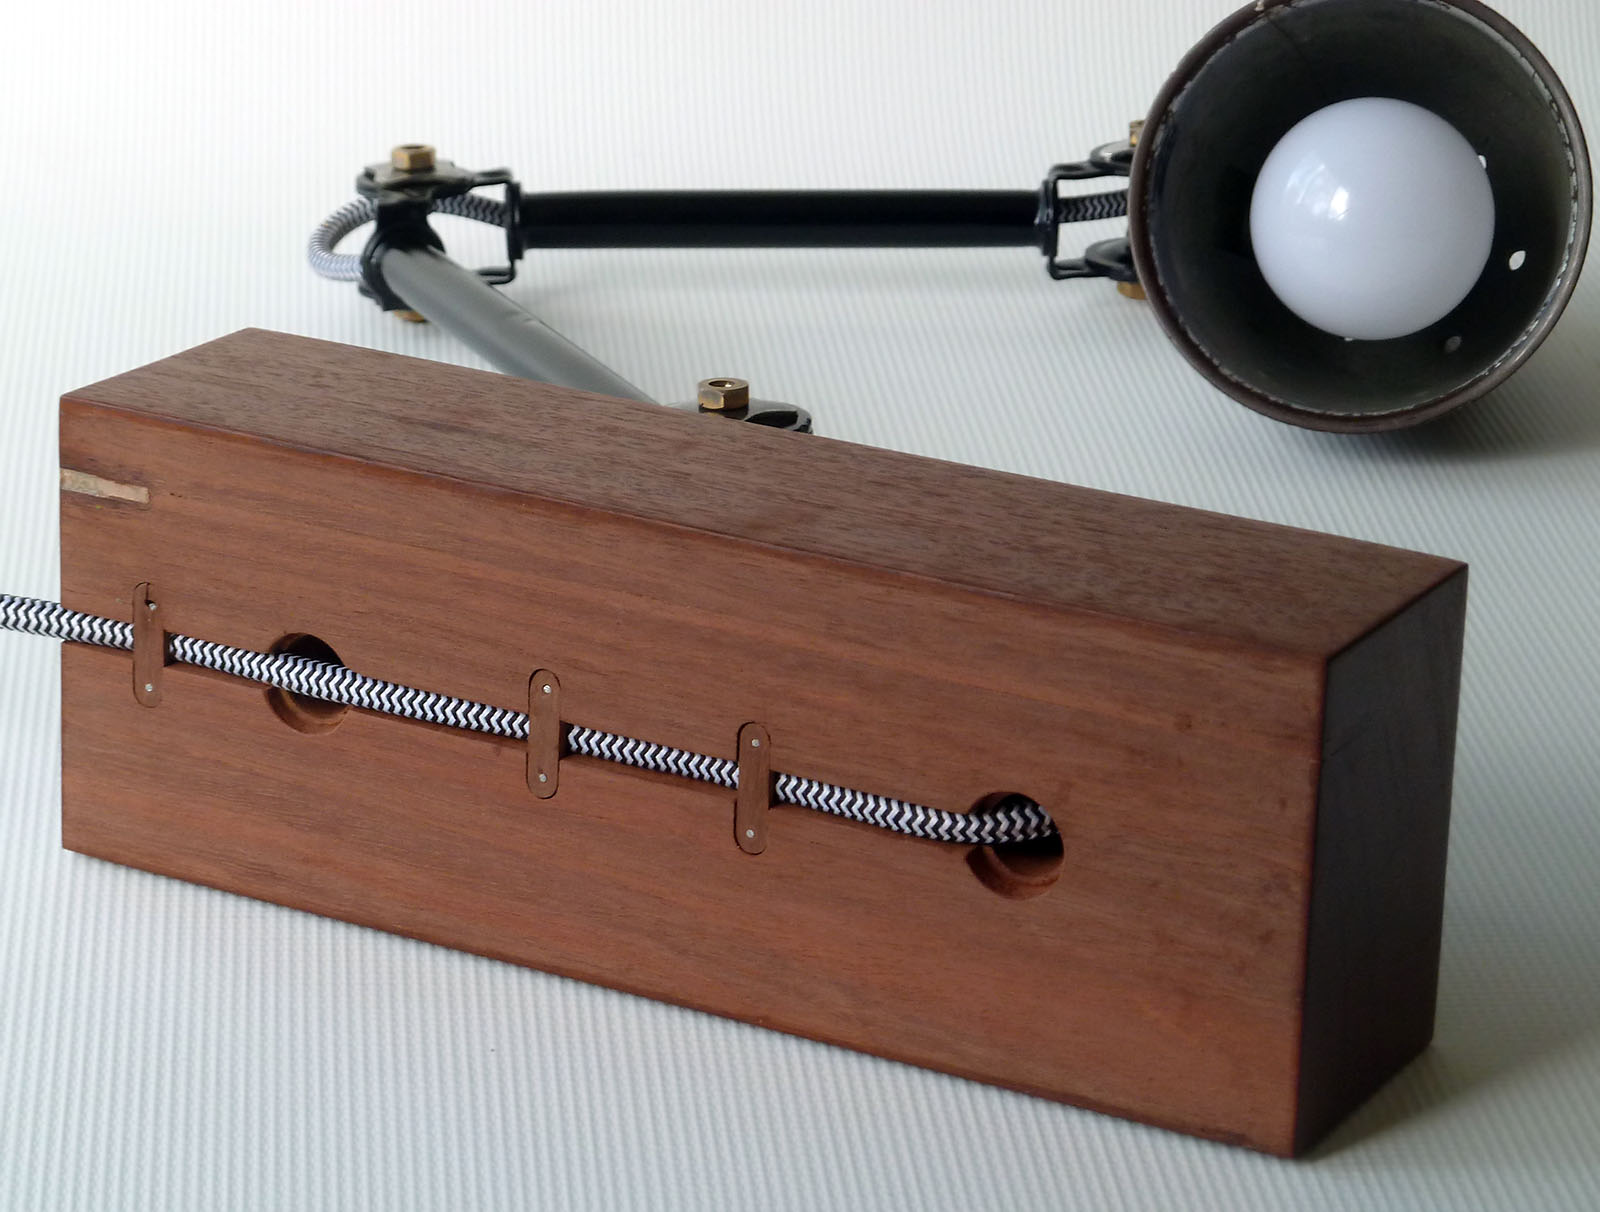
Just as happy with the underside as the topside.
I finished the block with 3rd Bit’s beeswax mix and it came up beautifully. Final assembly, a low-wattage LED globe and it was ready for service. Beautiful enough to star in the Pixar intro!
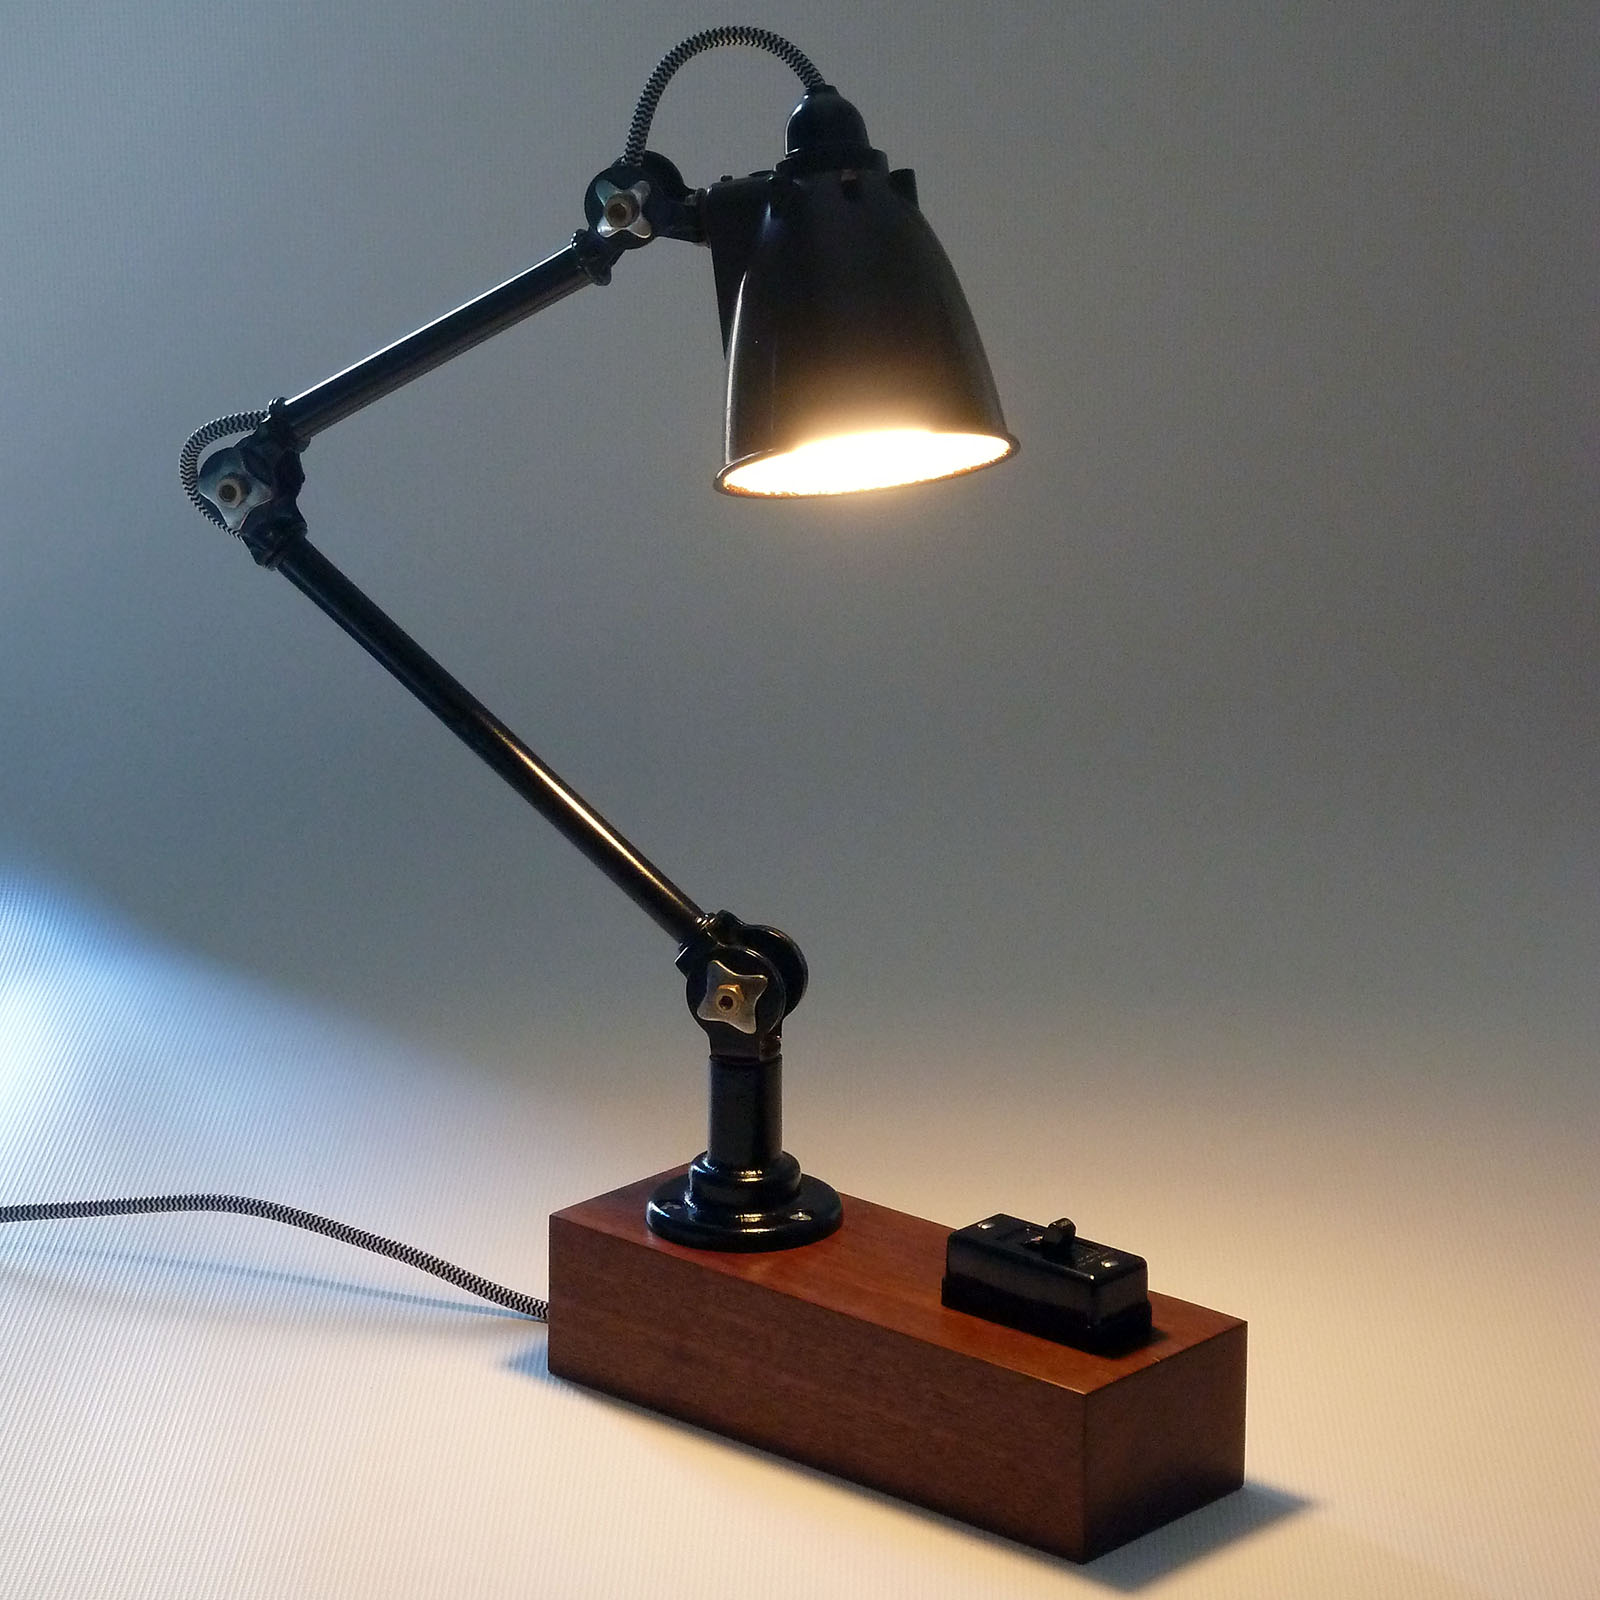
This photo doesn’t do justice to the shade. Even so, there’s no doubt the lamp is a much lovelier thing than I started with.
Bonus snow pic 🙂
It’s a beautiful thing. Nice work!
Looks great – well done!
Looks fabulous. Very talented. M.